SarrpCS Installation Instructions
This guide will outline steps necessary to install SarrpCS software. It is assumed that you are setting up a system from scratch on a Windows 10 machine. The instructions on this page do not apply to Windows 7 machines.
Note! These instructions should be used when setting up a new computer. The bundled automated scripts have been tested on Windows 10 only.
Procedure
The following procedure is applicable for the following versions:
5.2.15.2.2
Download Installation Package
A bundled installation package is now available which includes all the software needed to properly install SarrpCS on a Windows 10 machine. This bundle can be downloaded via the links below:
Extract the zip folder somewhere that is easily accessible on the target computer.
Run Bundled Script
To install SarrpCS, run the bundled install-sarrpcs.bat file. Be sure to run this file as administrator (right click -> Run as Administrator). This script will install many of the prerequisite software needed by SarrpCS including:
- Basler Pylon
- Galil GDK
- ImageJ
- TeamViewer
- Chrome
- Visual Studio Redistributables
- ShareX
- Notepad++
- RapidEE
Note: If running the batch script fails, follow the instructions below using Windows Powershell
Run Script via Powershell
- Open a Powershell instance as Administrator and navigate to the extracted contents of the SarrpCS bundle. Use the
cdcommand to do this:
cd "C:\<path to extracted content>"
- Navigate using the
cdcommand again into the folder where theinstall-sarrpcs.batscript is. - Run the script by typing in
install-sarrpand then pressTabto auto-complete andEnterto run the script.
Install Panel Software
Varian
Follow the instructions provided by Varex to install the Varian drivers/software. The instructions are included in the installation package found here.
Perkin Elmer
Follow the manufacturer instructions to install the Perkin Elmer panel libraries. The software package can be downloaded here.
Basler
Basler is installed automatically by the provided install script. Ensure that GigE and DirectX drivers are installed on the system. These are both required for SARRP.
Point Grey Portal Camera Setup
Starting with version 5.2.0 of SarrpCS, there is no longer a need for Active DCAM. Instead, the drivers and software from Point Grey (a.k.a FLIR) should be installed. In lieu of Active DCAM, we can now use the software FlyCap2 Viewer to view the portal camera. See the section below for instructions on installing this software.
FlyCapture Installation
Download the latest version of the FlyCapture SDK and FlyCap2 Viewer using the links below:
Install the FlyCapture SDK
- Run the installer
- When prompted in the
User Informationpage, uncheckAutomatically register with PGR via the internet - For
Setup Type, chooseMinimal - In the
Interface Driver Selectionpage, selectI will use FireWire cameras. Ensure that both sub-checkboxes are checked. - In the
Additional Installer Options, check the boxThe installer will register DirectShow dlls.
Install the FlyCap2 Viewer
- Run the downloaded installer
- When prompted in the
User Informationpage, uncheckAutomatically register with PGR via the internet - In the
Interface Driver Selection, make sure nothing is checked
Portal Camera Viewer Setup
On SARRP systems that have Point Grey cameras installed, SarrpCS does not integrate the portal camera directly into the SarrpCS interface. Instead we use a 3rd party camera viewer to view the live camera feed. In the past we have used ActiveDCAM but starting with SarrpCS 5.2.0, we can choose what program to use at runtime. By default, SarrpCS tries to use the FlyCap2 Viewer from FLIR (i.e. Point Grey).
To change what camera viewer is used, follow these steps:
- Open the Start Menu and type in
regedit - Launch the
Registry Editorsoftware - In the top navigation bar, enter the following path and then hit
Enter:Computer\HKEY_CURRENT_USER\SOFTWARE\sarrpGUI - In the right portion of the Window, double click on
PortalCameraViewer - In the dialog that pops up, change the
Value datato the path of the viewer that should be used (i.e. ActiveDCAM or some other program)- Note: The path must point to an executable (
.exe), not a folder.
- Note: The path must point to an executable (
Dazzle
Install Pinnacle and the associated drivers from the provided disk.
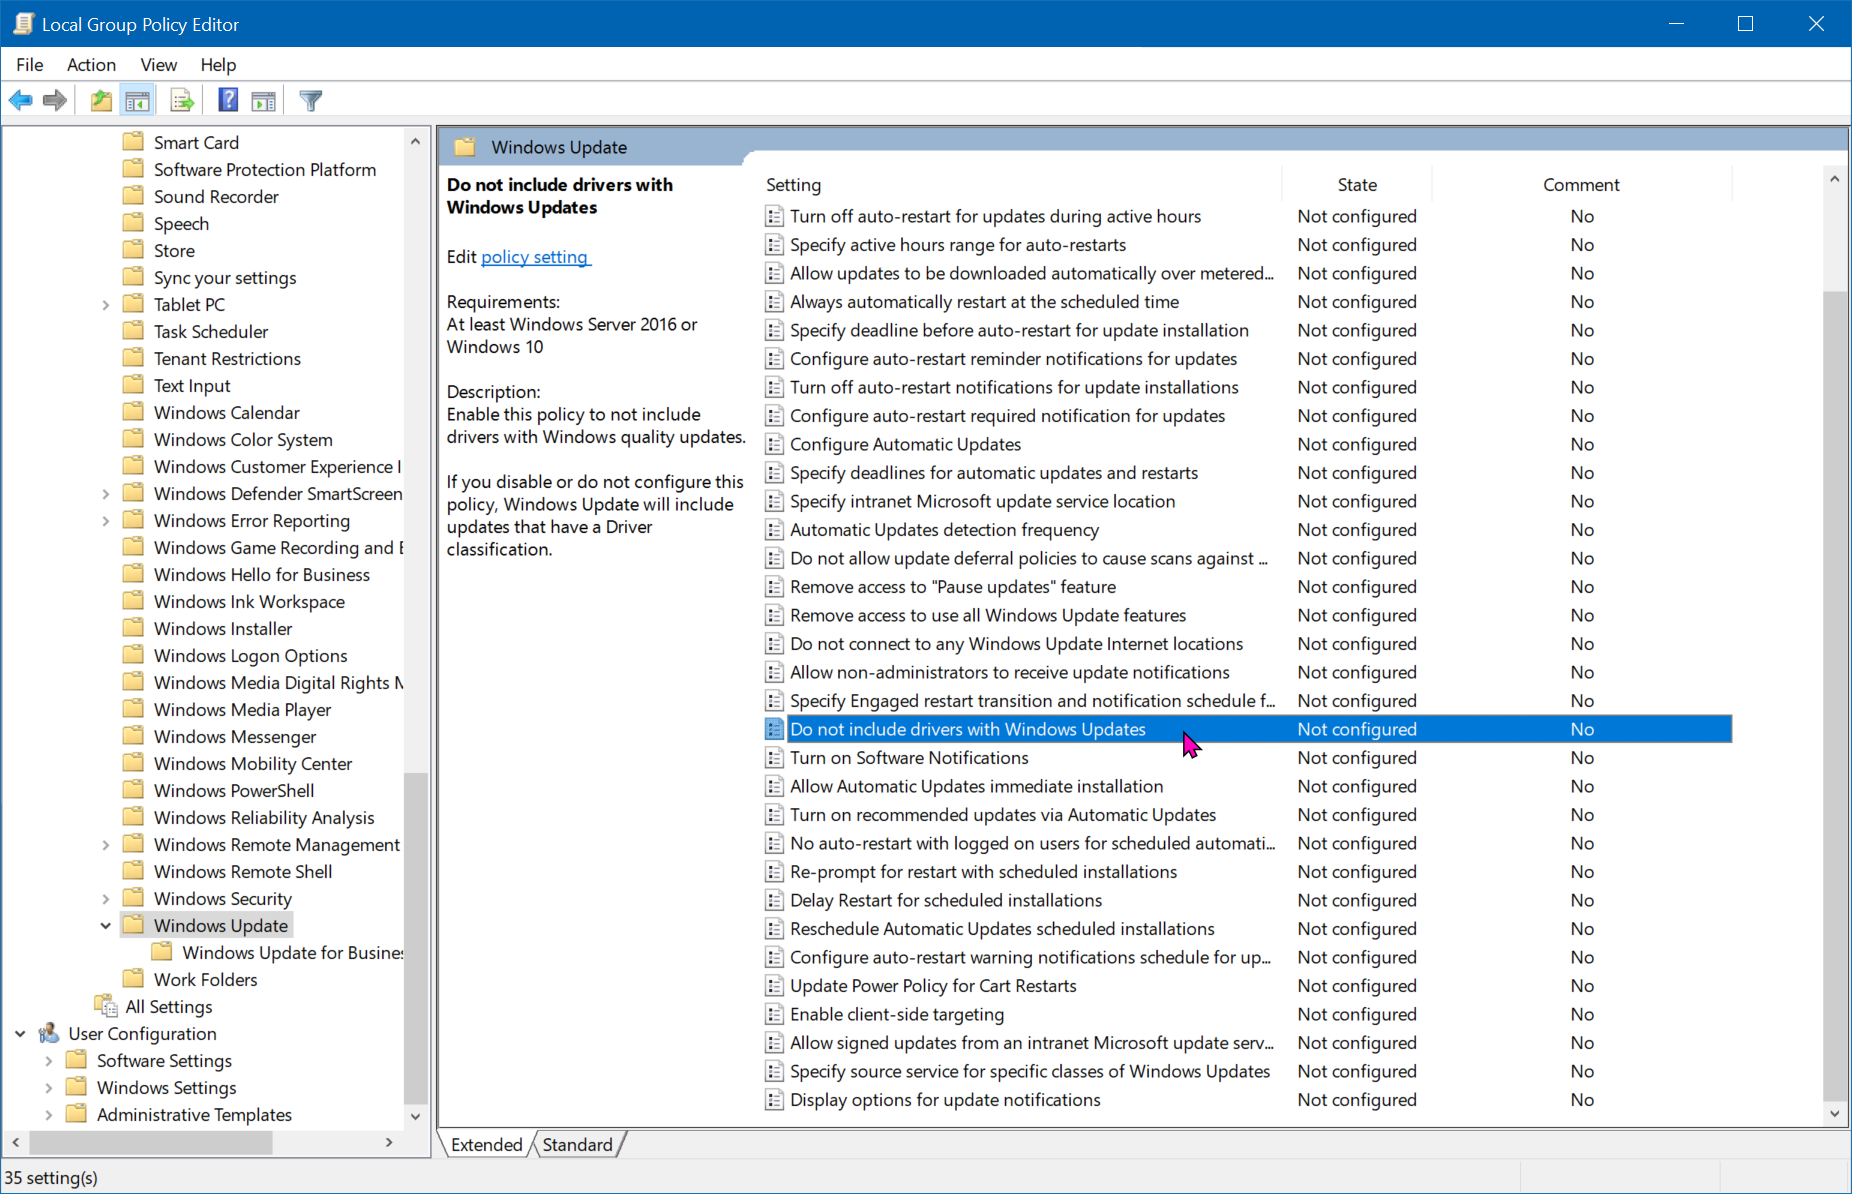
Disable Driver Upgrades on Windows 10
This section is based on this writeup.
To disable driver updates on Windows 10, follow these steps:
- Press the
Windowskey - Type in
gpeditand openEdit group policy - Navigate to
Computer Configuration>Administrative>Templates>Windows Components>Windows Update - In the right panel, find the option that reads
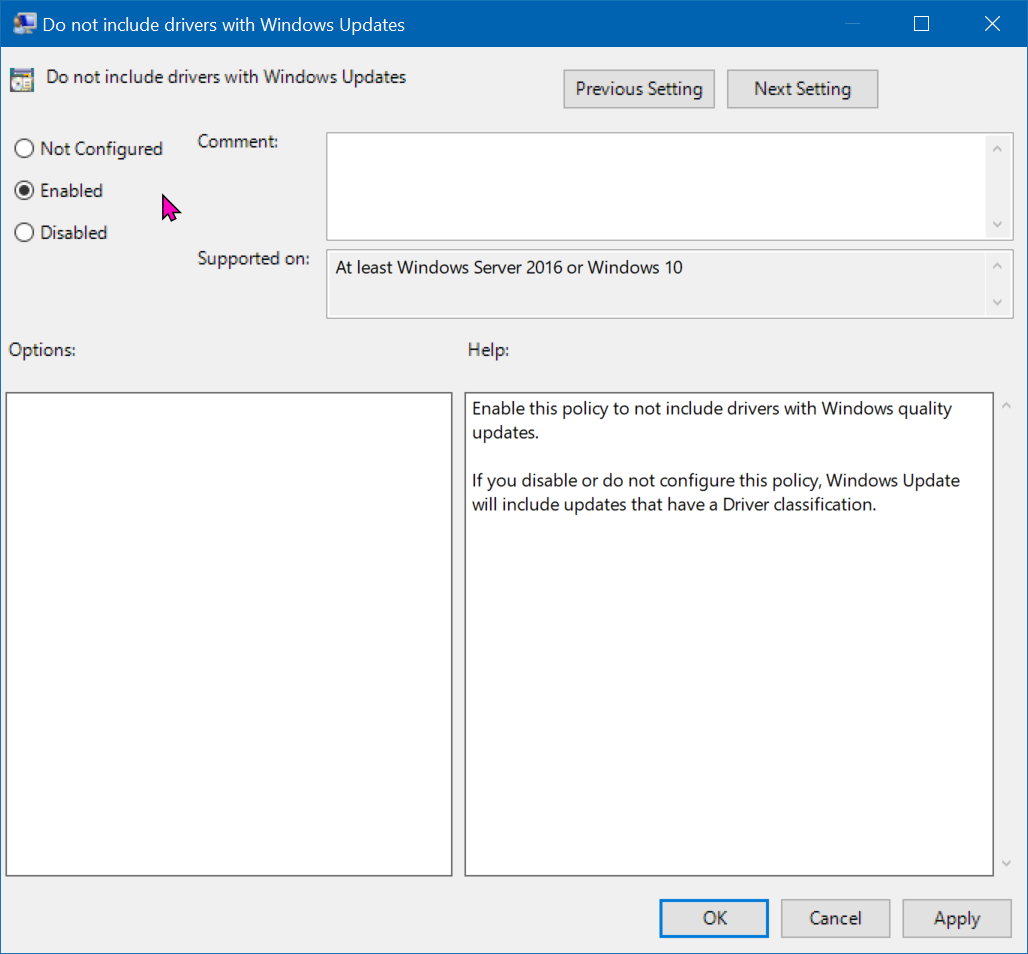
Do not include drivers with Windows Updateand double click it.
- In the window that pops up, select
Enabled
- Click
Apply - Click
OK
Configure SarrpCS
In order to work properly, SarrpCS needs to be run as administrator. To change how SarrpCS runs, follow these steps:
- Open Windows explorer and navigate to
C:\Program Files\sarrp\bin. - Right click on
sarrpGUI.exe - Select
Properties - Navigate to the
Compatibilitytab - At the bottom of the dialog box, select
Change settings for all users - In the dialog that pops up, check the box that reads
Run this program as administrator - Click
OK
Follow the same steps for the VideoSetup.exe program.